
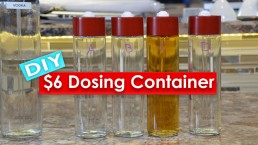
$6 DIY Dosing containers
A true reefjunkie will try and make his sump and filtration just as nice as his display tank.. after all is the whole point of these glass boxes to create a living work of art? Stay tuned to see how i made some classy looking dosing containers for about $6 each.. not bad!
To start go to your favorite grocerie store and pick up a fancy schmancy Voss water bottle, they come in 375mm or 800ml depending on your size needs. Alternatively if you wanted a larger container pasta jars (with plastic lids) also make a great option. You will also need some 6mm or 1/4 acrylic tubing to suck from the bottom of the container and a 1/4" bulkhead which i picked up from amazon.
Start by drilling the lid to fit the bulkhead, I prefer to use a step drill bit to ease the hole bigger until the bulkhead fits (quick and easy!) next you can choose to razor off/sand the extruded letters on the lid to give it that clean classy look. Once your lid is prepped you can hit it with a coat of krylon plastic fusion to go with your tanks color scheme.
Using a dremmel, razor, pvc cutters ect score and snap the clear 1/4" acrylic tube to the correct length (you want it to site a few mm above the bottom of the dosing container.
Insert the acrylic tube into the bottom of the bulkhead and screw it in place.
Next drill a small breather hole beside the bulkhead to ensure the dosing pump doesn't create a vacuum and the liquid can smoothly flow out.
To remove the letter on the Bottle, use a 2" stainless razor blade and scrape it off under running water.. a fresh blade should easily scrape off the decals while not scratching the glass bottle.
Ideally try not to scrape the volume ml numbers as it looks good and is still semi useful :)
You can likely find singular versions parts locally as the tubing and VOSS bottles are sold in larger packs on amazon.. but if you would like to buy in bulk and support the channel please purchase through the affiliate amazon links below.
Parts List:
Voss Water Bottles: http://amzn.to/2swPTGz
Bulkheads: http://amzn.to/2sx15Tx
1/4" OD Tubing: http://amzn.to/2qZ7Gnx

How Calcium Reactors work
Calcium Reactors sound big and scary.. however they can actually be quiet simple once you understand how they work. At its core you just injecting Co2 into a chamber full of coral skeleton to slowly dissolve it.. then dripping this nutrient rich water (called the effluent) back into the tank.
To tune the calcium reactor you have two adjustment, The drip rate of the effulent into your tank as well as the bubble count of how much co2 your injecting. You want to keep the PH inside the reactor at 6.5-6.7 to dissolve the media but not too fast.. if your PH was to drop too low you would melt all of your media and turn it into mush.
To make setting up a CO2 reactor easier i highly recommend using a PH controller as it will make your life much easier and act as a fail safe. When the PH hits 6.5 it will turn off the Co2, the PH inside the reactor will slowly rise and when it hits 6.7 it will turn the Co2 back on.
Having a PH monitor lets you see how your bubble count is affecting the PH inside the reactor. It may take some time but once you find the perfect bubble count your PH inside of the co2 reactor will stay consistent and the co2 solenoid will stay on and just be used as a backup.
I apologize for the cellphone video but here is a quick video i did for a form post a while back
https://www.youtube.com/watch?v=YoqpHR4EAlQ